Vinyl Panels to Protect the Coop, Update!
So, here was my DIY weekend warrior project.
?
As I said before in other posts. This is what I am trying to do to resolve some problems that I have encountered. This may not be a fix for everyone. Just thought I would share my idea in case it would help anyone else.
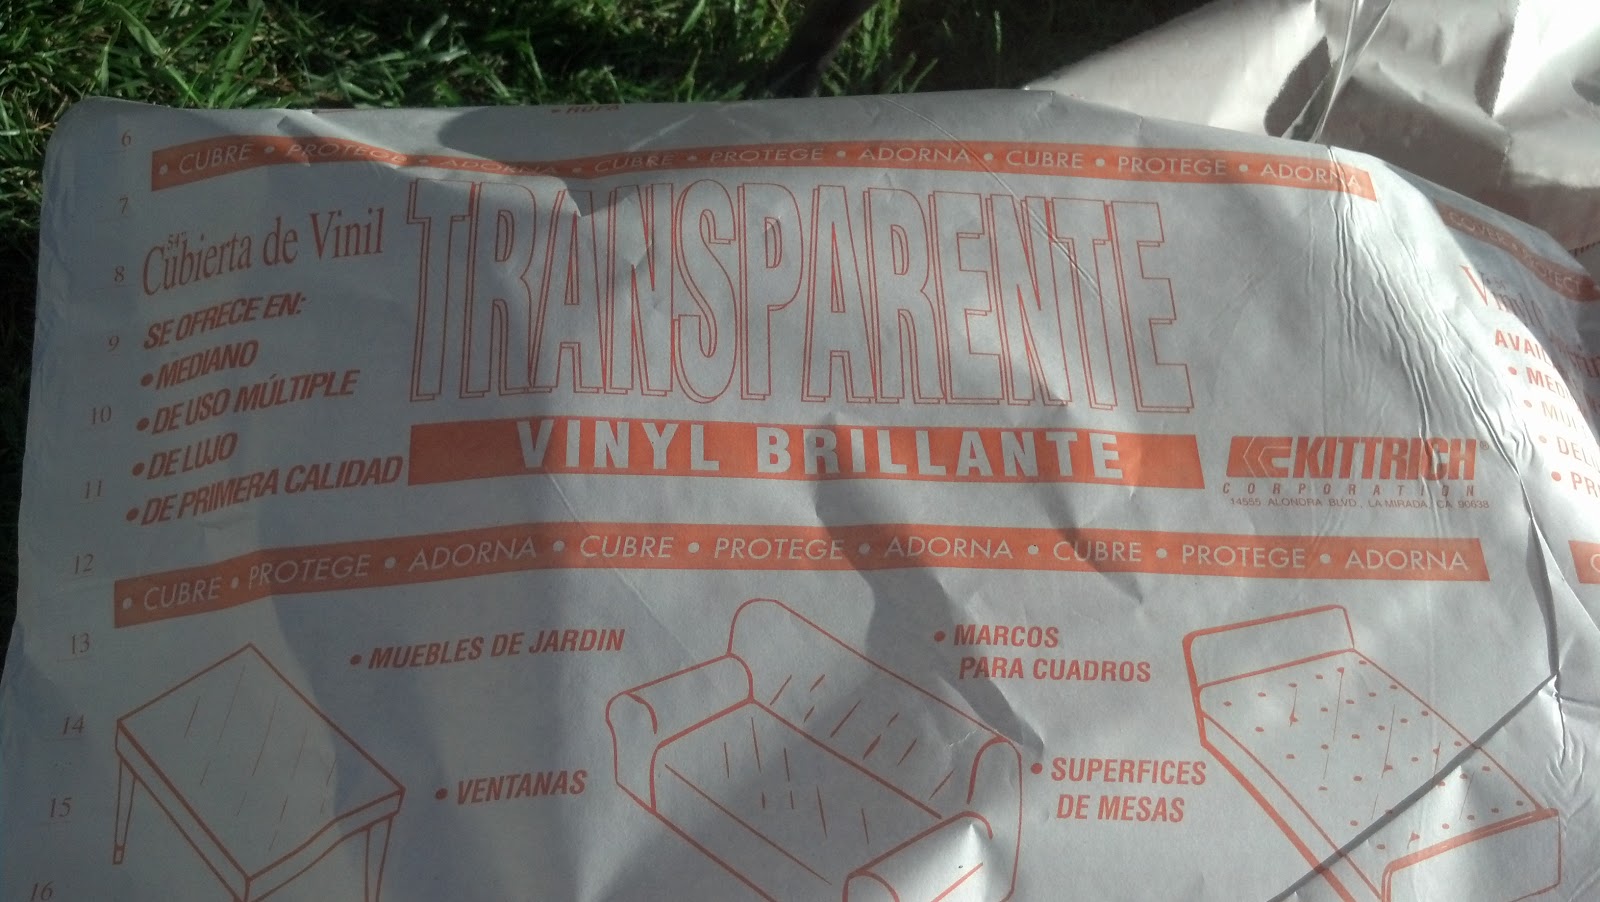 |
| Clear vinyl fabric- I bought a thick vinyl |
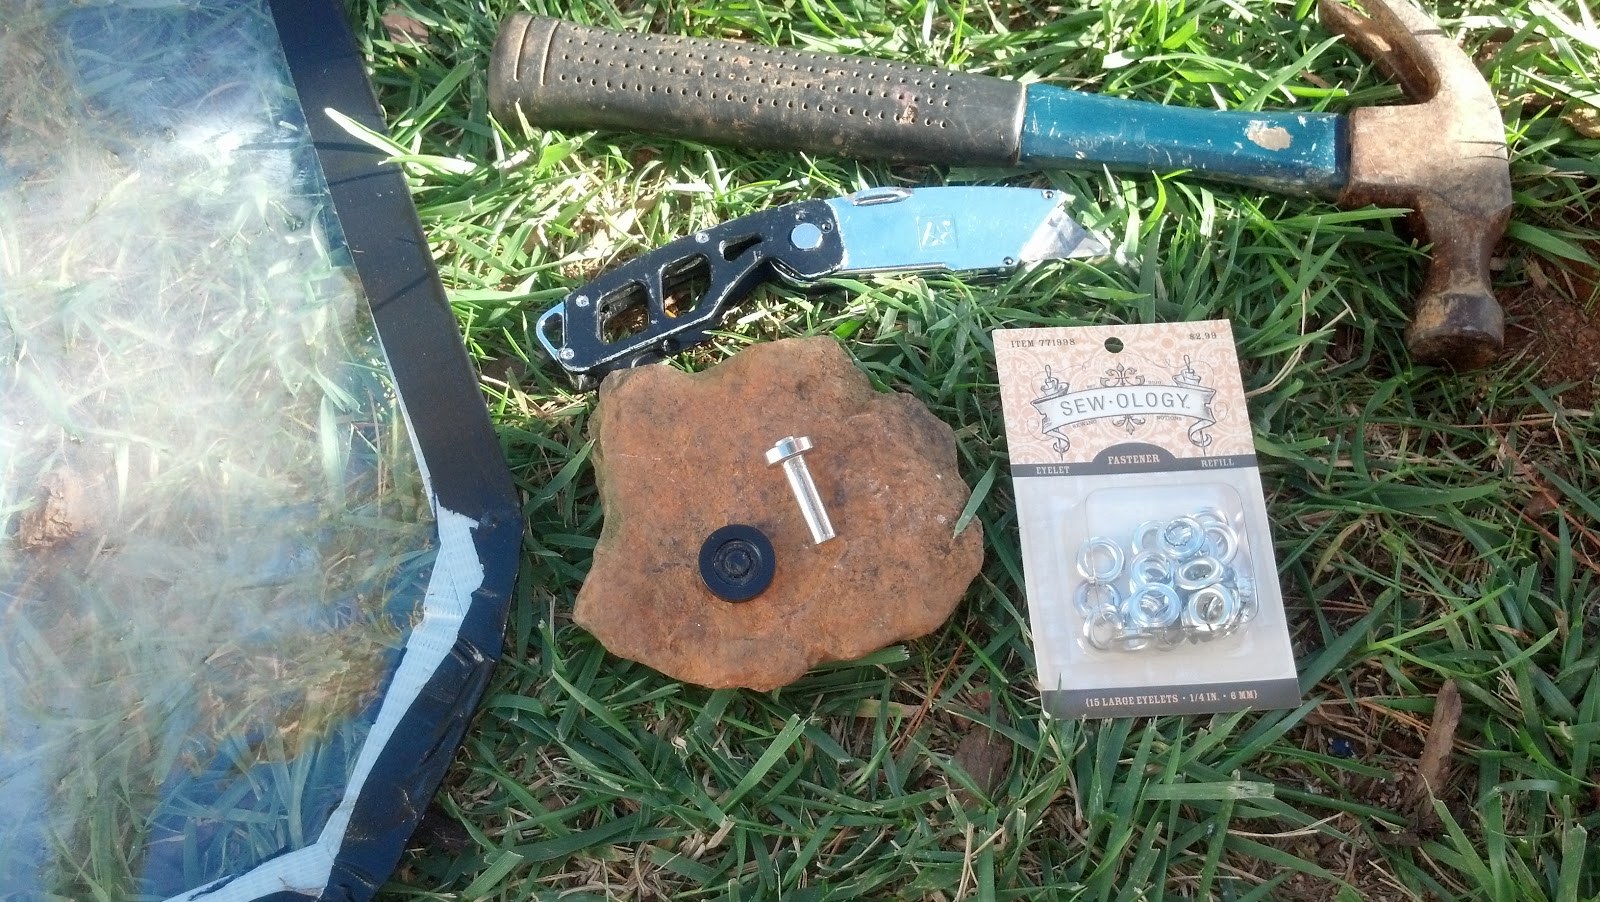 |
| Misc. Tools |
Enough yards of the Transparent Vinyl Fabric to cover sections of coop. (Got mine at Hobby Lobby- it was like $7 per yard)
Enough grommets to put 3 per side of your plastic panels.
A straight edge blade like a box knife
A hammer
A hole punch
Zip ties
(I spent around $150.00 total)
Step 1:
Depending on the construction of your coop, measure each section that you want to cover with these panels.
Step 2:
Carefully cut vinyl a little larger than your measurements. (you can always cut off more, but you can’t add it back.)
Step 3:
Use hole punch to put hole in corner of vinyl and attach it with zip tie as closely as possible to the section that you want to cover.
Step 4:
Use the box knife to carefully trim the vinyl to fit the sections.
Step 5:
Take the vinyl down, duct tape all four sides (optional), and put grommets into each corner through duct tape and vinyl, as well as an extra in the middle of the top and bottom sections to secure against wind and rain. (as long as your vinyl is thick enough, you probably wouldn’t need the duct tape. I just did it to make sure the grommets didn’t pull through the vinyl.
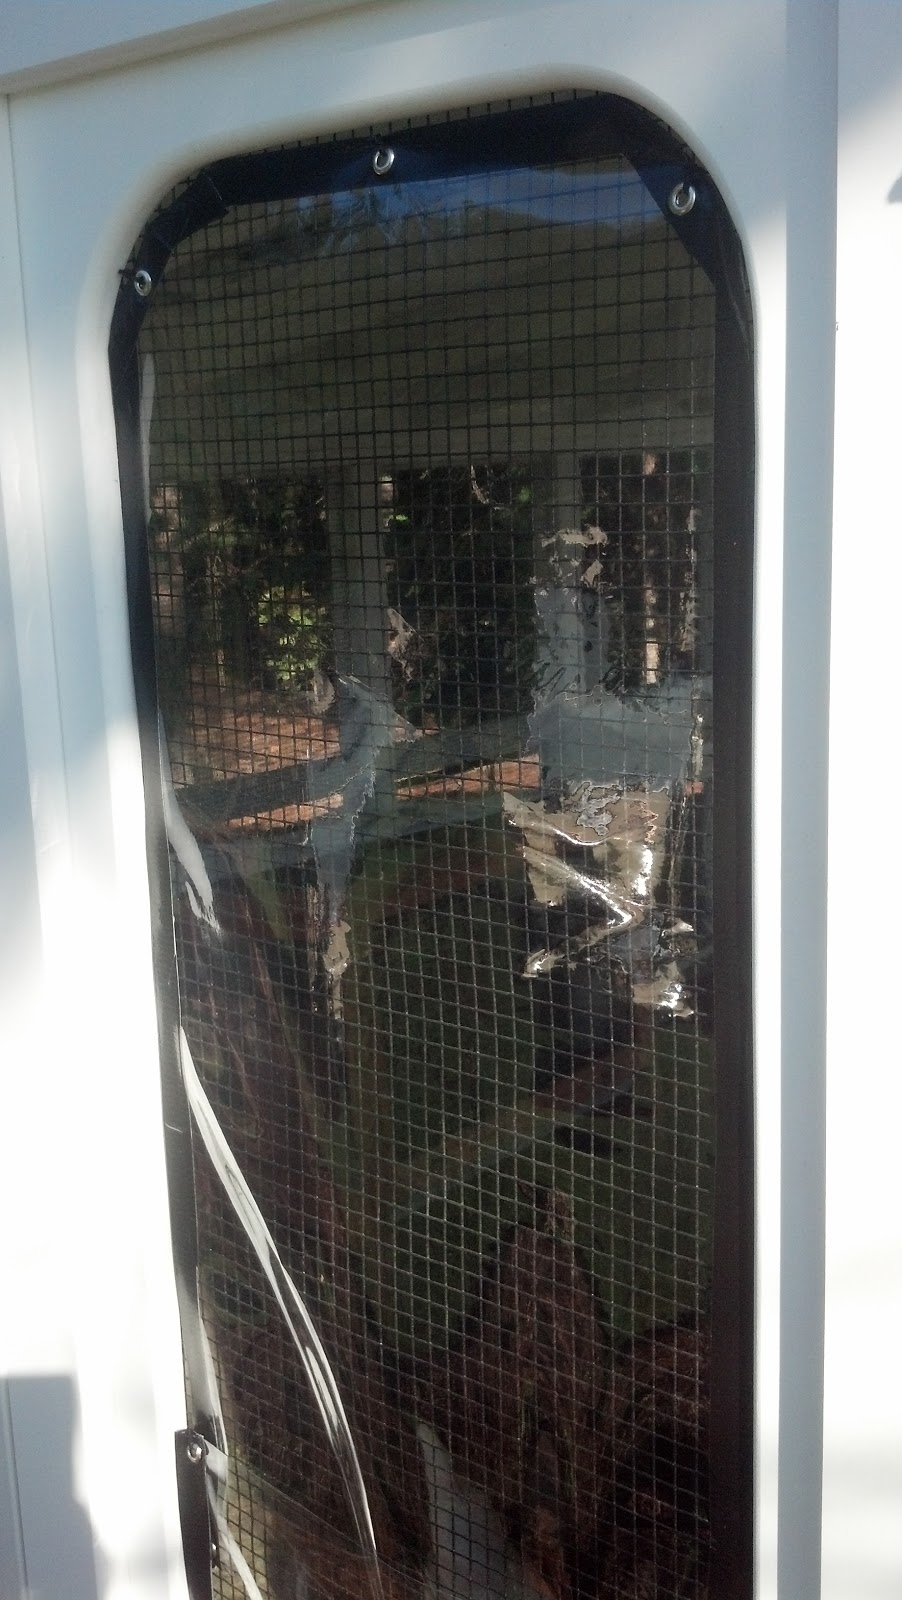 |
| Door, showing duct tape and grommets |
2. Do NOT completely enclose the coop, the chickens will need air. However, these panels will not be air tight. Also, completely enclosing coop will create a greenhouse like atmosphere, which could get very hot on unexpected warmer days, even in the winter.
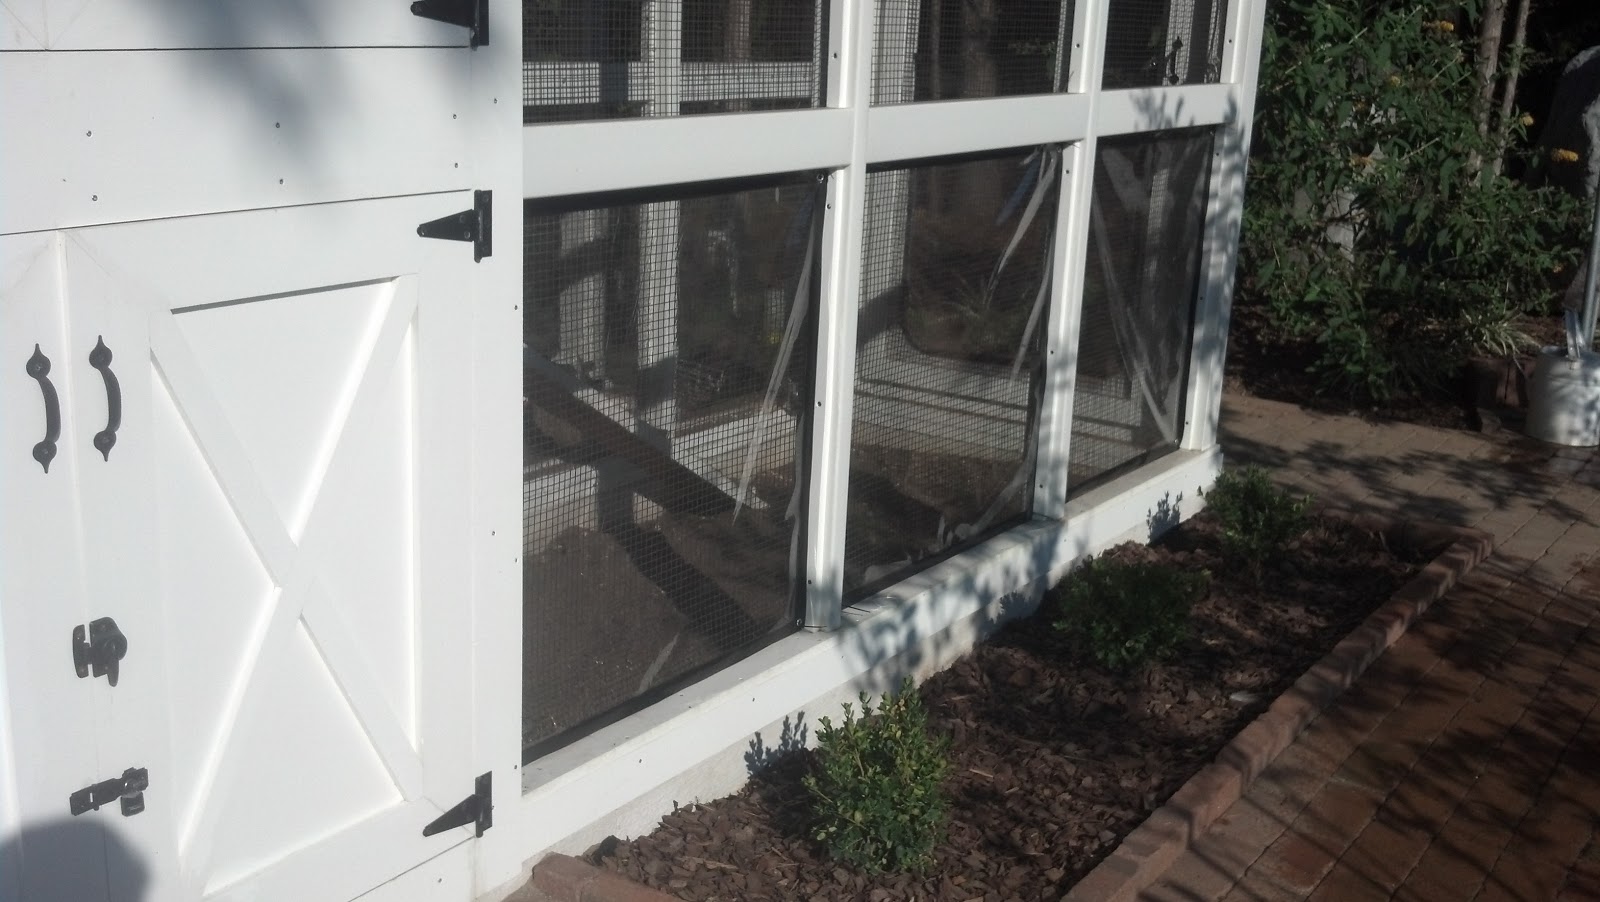 |
| I only have the panels attached at the bottom permanently. It is great, you hardly see them! I did not put them in the top sections! I don’t want it air tight. It would get way to hot on warmer days- think greenhouse. |
3. I only plan to put the top panels in if it is raining hard, snowing, sleeting, etc. I have been having trouble keeping the rain out during some of these long days of blowing rain, and I hate seeing an inch of rain inside my coop runs. The lower panels will be enough to keep the wind off the chickens (who are next to the ground), once it gets really cold. Only if it is bitter cold will I put the upper panels in. I plan to use ‘s’ hooks to attach them, to make it very easy to put them up and remove them.
 |
| Using Crystal Clear Vinyl Fabric makes it so you can see in, and the chickens can see out. |